
TL;DR:
- Glass pipe art transforms functional smoking tools into visually expressive objects combining aesthetic detail with practical airflow design. Expert craftsmanship involves core techniques like fuming, wig-wag, and internal sculpting, and requires attention to materials, precise joining, and proper annealing for durability. When evaluating or commissioning pipes, look for consistent, well-fused joints, uniform wall thickness, and evidence of proper heat treatment and COE compatibility.
Glass pipe artistry is the handcraft of turning functional smoking tools into intentional works of glass art, where every curve, color layer, and internal detail serves both aesthetic and practical purpose.
What this guide covers:
- Core techniques you’ll encounter in quality pieces: fuming, wig-wag, latticino, implosion, dichroic inclusion, and internal sculpting
- What to look for when evaluating a pipe’s craftsmanship, from wall uniformity to anneal evidence
- Practical outcomes: how to choose the right size, commission a custom piece, and care for what you own
This guide is written by Juiced for Theelevatedremedies, Ann Arbor’s go-to smoke shop for everything from entry-level glass to high-end handcrafted pieces.
Glass pipe designers face a tension that most craft forms don’t: the object has to work perfectly every single time you use it, and it has to be worth looking at while it does. A sculptural Sherlock with a deep, sweeping neck looks extraordinary on a shelf, but that long path cools smoke and adds draw resistance. A minimalist spoon fits in your pocket and clears fast, but there’s less surface area for the artist to express anything. Neither is wrong. They’re just different answers to the same question: how much are you willing to trade function for form, or form for function?
The best glass pipe artists don’t treat that as a trade-off at all. They design airflow into the aesthetic. A well-placed carb, a bowl seated at the right angle, a mouthpiece with exactly the right flare — these are functional decisions that also happen to define the visual character of the piece.
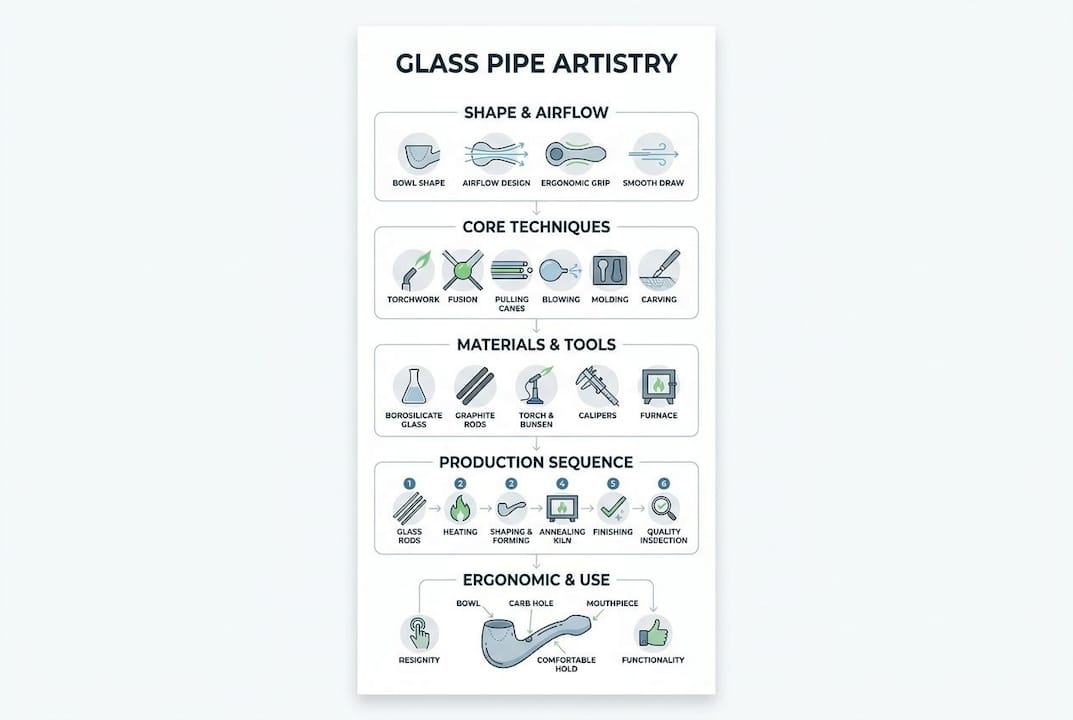
Here’s what you’ll find in this guide: how shape and air paths affect your draw, a full glossary of decorative techniques, the materials and tools behind the work, the production sequence from raw tube to finished pipe, how to size a piece for daily use, what practitioners actually look for in quality work, the cultural and legal context in the U.S., and a practical checklist for buying or commissioning.
Table of Contents
- 1. How shape and air paths affect your smoking experience
- 2. The core techniques that define glass pipe artistry
- 3. Materials and tools: what’s actually on the workbench
- 4. From raw tube to finished pipe: the production sequence
- 5. Size, ergonomics, and what actually works for daily use
- 6. What practitioners actually look for in handcrafted work
- 7. Glass pipes as cultural artifacts: history, exhibitions, and legal context in the U.S.
- 8. How to evaluate, collect, or commission a glass pipe
- Key Takeaways
- The part of glass pipe artistry most buyers miss
- Theelevatedremedies carries handcrafted glass worth looking at
- Recommended reading and references for deeper study
1. How shape and air paths affect your smoking experience
The single most useful rule in pipe design: short, wide air paths mean lower resistance and faster draws; longer or chambered paths mean cooler, smoother smoke. Everything else in pipe geometry flows from that.
Here’s how the common shapes play out in practice:
- Spoon pipe: The most common hand pipe shape. A short, direct path from bowl to mouthpiece means minimal cooling but very low drag. Easy to clear, easy to clean, and the compact form leaves room for decorative work on the bowl and body.
- Sherlock/Gandalf: The arched or elongated neck adds path length, which cools smoke noticeably. The trade-off is more surface area for resin to collect, so cleaning frequency goes up. Visually, the curved neck is one of the most expressive shapes in the art form.
- Chillum/one-hitter: Straight tube, no carb, minimal path. Fast and direct, but no cooling whatsoever. Best for small, single draws rather than extended sessions.
- Bubbler: Adds a water chamber to the hand pipe format. Water filtration cools and lightly filters smoke, giving you something close to a bong experience in a portable package. The water path also adds cleaning complexity.
- In-line chambers and percolators: Found more often in larger water pipes, but some high-end hand pipes incorporate small internal chambers. These slow the smoke, increase surface contact, and cool the draw significantly. They also make cleaning harder.
Internal features matter as much as external shape. A carb hole (the small hole on the side of most spoons and sherlocks) lets you clear the chamber by releasing your finger, which controls how much fresh air mixes with smoke. Pipes without a carb, like chillums, rely entirely on the bowl clearing naturally. Diffusion in bubblers and water pipes breaks smoke into smaller bubbles, increasing surface area contact with water and cooling the draw further.
Pro Tip: Choose a pipe whose internal path you can actually reach with a pipe cleaner or cotton swab. A beautiful piece that traps resin in an inaccessible chamber will degrade in airflow quality faster than a simpler design. Cleaning access is a functional feature, not an afterthought. See the step-by-step bong cleaning guide for practical maintenance techniques that apply to hand pipes too.
2. The core techniques that define glass pipe artistry
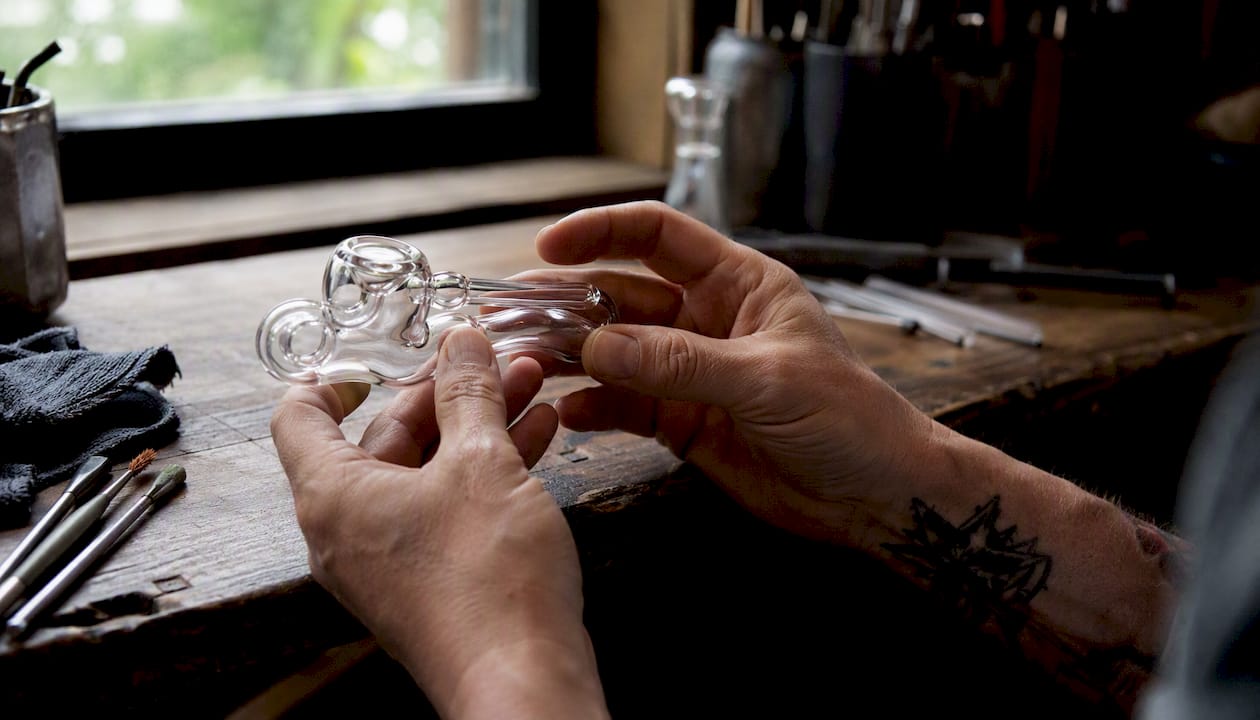
The Corning Museum of Glass curates pipe-making tutorials and technique references that cover the full range of methods contemporary artists use. The short list of techniques you’ll encounter most often in quality handcrafted pieces:
- Fuming: Vaporizing metals, typically silver or gold, inside the hot glass. The metal vapor deposits a thin layer on the interior surface. Silver fuming produces yellow-to-green tones; gold fuming shifts toward pink and purple. The striking part: fuming visibly changes as resin accumulates with use, deepening and shifting color over time. A clear pipe becomes a record of its own history.
- Wig-wag: A pattern created by reversing the direction of a colored cane or rod during the working process, producing a tight, symmetrical wave or chevron. Consistent wig-wag requires precise, patient repetition. Sloppy reversals are immediately visible, which is why this technique is a reliable indicator of skill level.
- Latticino: Twisted glass cane work, typically white or colored, arranged in spiral or net patterns inside the glass. Latticino originated in Venetian glassblowing and was adapted by American pipe artists into a signature decorative element. The cane is prepared separately, then incorporated into the pipe body.
- Implosion / imploding dots: A technique where colored dots or designs are placed on the outside of the glass, then pulled inward by heating and stretching. The result is a three-dimensional pattern that appears to float deep inside the glass wall. Implosion work creates visual depth that’s hard to achieve any other way.
- Millefiori: Literally “a thousand flowers” in Italian. Pre-made glass canes with cross-sectional patterns (flowers, stars, geometric shapes) are sliced and incorporated into the pipe surface. Each slice reveals the same pattern, creating a mosaic effect.
- Dichroic glass: A specialty glass coated with metallic oxides that produce different colors depending on the viewing angle and light source. Dichroic inclusions shift between two or more colors as you rotate the piece. The coating is applied industrially to glass sheets, which artists then cut and incorporate into their work.
- Internal sculpting: Freeform shaping of glass inside the pipe body, creating figures, landscapes, or abstract forms visible through the outer wall. This is among the most technically demanding approaches because the artist is working blind, shaping hot glass they can’t directly touch.
- Dot stacks: Layered dots of colored glass applied to the surface, built up in height to create a textured, three-dimensional exterior. Dot stacks can be purely decorative or can serve as grip points on the pipe body.
- Vortex / spiral work: Colored cane or frit arranged in a spiral pattern around the pipe body. When done well, the spiral appears to rotate as you turn the piece.
A safety note on fuming: working with vaporized metals requires proper ventilation. Silver and gold fuming are the most common, but some artists use other metals. Adequate airflow in the workspace and appropriate respiratory protection are non-negotiable during this step. The HotGlass technique overview covers these methods in more detail for anyone going deeper into the technical side.
3. Materials and tools: what’s actually on the workbench
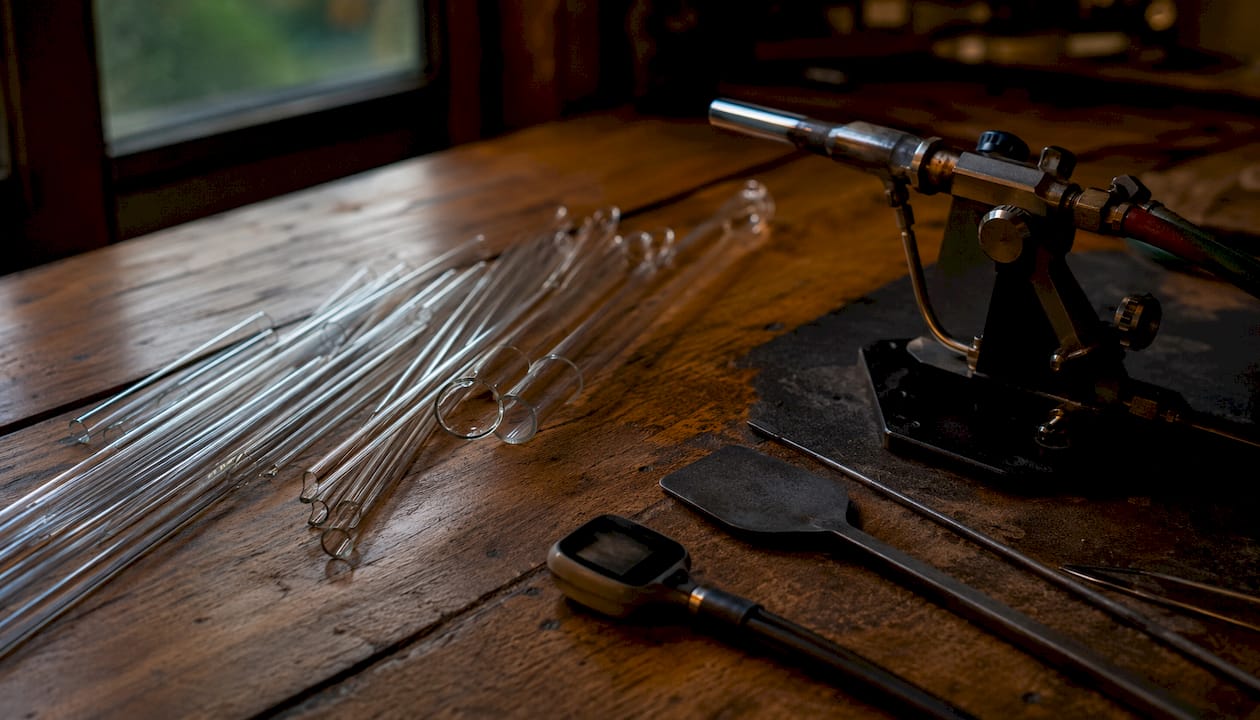
Borosilicate glass is the standard material for functional hand pipes, and for good reason. Its low coefficient of thermal expansion (COE 33) means it handles rapid temperature changes without cracking, which matters every time you heat a bowl. It’s also harder and more chemically resistant than soft glass, so it holds up to regular cleaning with isopropyl alcohol without degrading.
Here’s how the main materials compare:
| Material | COE | Thermal durability | Typical use |
|---|---|---|---|
| Borosilicate (boro) | ~33 | High | Functional pipes, daily use |
| Soft glass / color glass | — | Moderate | Decorative work, color layering |
| Dichroic glass | Varies | Moderate | Accent inclusions, color-shift effects |
| Fused silica | — | Very high | Specialty/scientific; rarely used in pipes |
The COE number matters most when combining materials. Mismatched COE values between the base glass and any added color or decorative element create internal stress as the piece cools. That stress can cause crazing (a network of fine surface cracks) or outright failure at the joint. Reputable artists either work entirely within one COE family or use tested compatible materials.
Tools you’ll find in a functional pipe workshop:
- Bench torch: A stationary torch, typically fueled by propane/oxygen or natural gas/oxygen, that produces a stable, controllable flame. The workhorse of the studio.
- Hand torch: Smaller and more portable; useful for detail work and finishing touches.
- Annealing kiln: A temperature-controlled oven that holds finished pieces at a specific temperature, then slowly cools them to relieve internal stress. Skipping this step produces pieces that look fine but are structurally fragile.
- Graphite tools and paddles: Used to shape hot glass without sticking. Graphite doesn’t bond to molten glass, making it ideal for forming bowls and mouthpieces.
- Mandrels: Metal rods used to shape interior openings and maintain diameter during forming.
- Punty: A solid glass or metal rod used to hold a piece while the other end is worked.
- Stringer cutters and tweezers: For precise placement of thin glass rods and decorative elements.
Safety note: Proper ventilation is non-negotiable in any glass pipe workshop. Metal fuming, torch combustion, and heated glass all produce fumes that require airflow management. Oxygen/acetylene setups carry additional fire and pressure risks. Basic PPE includes safety glasses rated for torch work and heat-resistant gloves for handling hot pieces.
The workshop safety and annealing guidance from Green Plate Pursuits covers these requirements in practical detail for anyone setting up a workspace.
4. From raw tube to finished pipe: the production sequence
The workflow follows a clear sequence: heat, shape, add features, anneal, finish. Every step depends on the one before it, and rushing any stage shows up as a defect in the final piece.
The standard production steps:
- Prepare the tubing. Select borosilicate tubing of the appropriate diameter for the pipe style. Inspect for bubbles or inclusions in the raw glass before starting.
- Pull the stem. Heat the tubing and stretch it to narrow the stem section, controlling diameter and wall thickness. This determines the mouthpiece end’s feel and draw resistance.
- Form the bowl. Heat the opposite end and use graphite tools and gravity to open and shape the bowl. Bowl depth and width directly affect how much material the pipe holds and how evenly it burns.
- Punch the carb. Using a heated pick or mandrel, punch the carb hole at the correct position on the side of the bowl section. Placement affects ergonomics significantly.
- Add decorative elements. This is where fuming, wig-wag, latticino, dot stacks, or other techniques are applied. The sequence of decorative steps varies by technique; fuming typically happens early, while surface dot work can happen later.
- Finish the mouthpiece. Flame-polish the mouthpiece opening to a smooth, comfortable edge. Rough edges are a finishing defect.
- Break off from the parent tube. Score and separate the finished pipe from any remaining tubing.
- Anneal. Place the piece in the kiln at the appropriate temperature for the glass type, hold, then ramp down slowly. This step is what separates a structurally sound piece from one that’s waiting to crack.
- Cold-work (optional). Grinding, sandblasting, or polishing after annealing to refine surfaces, add texture, or create frosted effects.
Defects to watch for in a finished piece:
- Stress cracks, especially near joints and the carb hole
- COE-related crazing: a fine network of surface cracks indicating incompatible materials
- Bubbles at critical joints (bowl-to-stem connection is the most common failure point)
- Uneven wall thickness, visible when you hold the piece up to light
- Rough or sharp mouthpiece edges indicating incomplete flame polishing
Artists often place their signature mark on the underside of the bowl or along the stem, either engraved after annealing or worked into the glass as a color detail during production.
5. Size, ergonomics, and what actually works for daily use
For most daily users in the U.S., a medium-sized pipe in the 4–5 inch range hits the practical sweet spot. It’s portable enough to carry without bulk, the air path is long enough to provide a noticeably smoother draw than a chillum, and the bowl size suits single or small group sessions without wasting material.
Size trade-offs at a glance:
- Small (3–4 inches): Maximum portability, minimal cooling, easiest to lose. Good for travel or discreet use. Less surface area for decorative work, so artistic complexity is limited.
- Medium (4–5 inches): The daily driver. Balances portability with a longer air path, fits most hands comfortably, and gives artists enough canvas for meaningful decorative techniques.
- Large (5+ inches): Cooler, smoother smoke due to the longer path. Less portable, more fragile in transit, and harder to clean thoroughly. Better suited as a home piece or display item.
Ergonomics checklist:
- Grip: The pipe should sit naturally in your hand without requiring an awkward hold to cover the carb. Test the grip before buying.
- Mouthpiece comfort: Flared mouthpieces are more comfortable for extended use; straight tubes work fine for quick draws.
- Bowl size: Match bowl volume to your typical session size. An oversized bowl wastes material; an undersized one requires constant repacking.
- Weight distribution: A heavy bowl on a thin stem creates balance problems and increases drop risk.
Pro Tip: Match wall thickness to how you actually use the piece. A 4mm+ wall is noticeably more durable for daily carry and rough handling. Thinner walls (2–3mm) are fine for display pieces or careful home use, but they won’t survive a hard drop onto tile. If you’re also exploring how different bowl designs affect airflow, the same principles of path length and opening diameter apply across pipe formats.
6. What practitioners actually look for in handcrafted work
The single most telling sign of a genuinely handcrafted piece is what artists call “worked” glass: deliberate, consistent color patterns, controlled wig-wags, and signature internal details that couldn’t have been produced by a machine or a rushed hand.
That’s the core insight practitioners repeat: the visual complexity of a worked piece is also evidence of the technical discipline behind it. Consistent wig-wags, clean latticino spirals, and well-placed implosion dots don’t happen by accident. They require the same motion, the same heat, the same timing, repeated dozens of times in sequence.
Shop tips for collectors and new makers:
- Ask specifically whether the piece was annealed in a kiln, not just air-cooled. Air-cooled glass looks fine but carries internal stress.
- Ask what COE the base glass is and whether all added colors are compatible. A reputable maker knows this immediately.
- Look for the artist’s mark. Unsigned pieces aren’t automatically lower quality, but a maker who signs their work is accountable for it.
- When commissioning, expect a turnaround of several weeks for complex worked pieces. Rush timelines and high-technique work don’t coexist.
- A reasonable price for a worked, signed piece from an established maker reflects torch time, materials (dichroic and precious-metal fuming add real cost), and the skill level required. Suspiciously cheap “handmade” pieces usually aren’t.
The Corning Museum of Glass LibGuides list specific pipe-making tutorials and technique references that are worth reviewing before commissioning or purchasing, particularly if you want to ask informed questions about a maker’s process.
Here’s an example of what a typical workflow looks like for a fumed, worked spoon: the artist starts with borosilicate tubing, pulls the stem, then fumes the interior with silver before forming the bowl. Color cane is applied during the bowl-forming stage, worked into a wig-wag pattern while the glass is still hot. Dot stacks go on last, before the piece is broken off and placed in the annealing kiln. Total torch time for a well-executed piece: often two to four hours, not counting kiln time.
7. Glass pipes as cultural artifacts: history, exhibitions, and legal context in the U.S.
Glass pipe art moved from counterculture utility to recognized functional art over roughly five decades, with museum exhibitions and high-profile gallery shows marking the transition from underground craft to legitimate art form.
The broad timeline:
The earliest functional glass pipes in the American counterculture were simple, utilitarian objects. The shift came with the wider adoption of borosilicate glass in the 1990s, which gave artists a material that could handle both the thermal demands of daily use and the complex decorative techniques borrowed from scientific glassblowing and Italian lampworking traditions. The “heady glass” movement that followed treated pipes explicitly as collectible art objects, with individual pieces commanding prices comparable to gallery sculpture.
By the 2000s and 2010s, museum institutions began engaging with this work seriously. The Corning Museum of Glass has documented the history, culture, and artists behind pipe-making as part of its broader coverage of American studio glass. Exhibitions framing pipes as functional art have appeared in both dedicated glass art venues and broader contemporary craft contexts, with curators citing the technical complexity and cultural significance of the work.
Legal context for U.S. readers: Cannabis laws vary significantly by state, and the legal status of pipes as paraphernalia depends on jurisdiction and context. NORML’s state-by-state guide is the most current reference for understanding the rules in your state. This article is general information, not legal advice. Confirm the current rules for your specific situation with a qualified professional or your state’s relevant authority.
8. How to evaluate, collect, or commission a glass pipe
The one-line checklist: fit, finish, function, provenance, and anneal evidence. A piece that passes all five is worth owning; a piece that fails any one of them is a risk.
Buying checklist:
- Wall thickness is uniform when you hold the piece up to light. Thin spots near joints are structural weak points.
- Joints (bowl-to-stem, any added accents) are fully fused with no visible seam gaps or bubbles.
- No stress cracks, especially around the carb hole and bowl base.
- Artist mark is present, or the seller can identify the maker.
- Annealing was done in a kiln, not air-cooled.
- The carb hole and mouthpiece are accessible for cleaning. Test this before buying.
- All added colors and decorative elements are COE-compatible with the base glass.
Questions to ask when commissioning:
- What COE is your base glass, and are all your color additions compatible?
- Do you anneal in a kiln, and what’s your annealing schedule for this type of piece?
- What’s your expected turnaround time, and do you require a deposit?
- What cleaning method do you recommend, and are there any materials I should avoid?
- What’s the expected lifespan with regular use, and what voids your implicit quality guarantee?
What drives price:
- Technique complexity: A fumed spoon takes less time than a fully worked wig-wag with implosion dots. The price difference is real.
- Torch time: More complex pieces require more hours at the bench. A two-hour piece and an eight-hour piece shouldn’t cost the same.
- Materials: Dichroic glass and precious-metal fuming (gold, silver) add material cost on top of labor.
- Artist reputation: Established makers with exhibition history or a strong collector following command premium prices, and those prices are generally justified by the consistency and quality of their work.
Material quality, glass thickness, airflow design, and ease of cleaning are the factors that buying guides consistently identify as most important for long-term satisfaction. The evaluation checklist above covers all four.
Key Takeaways
Glass pipe artistry combines functional design with handcraft technique, and the most reliable way to evaluate a piece is to look for evidence of patient, deliberate work at every stage of production.
| Point | Details |
|---|---|
| Form and function are inseparable | Airflow, bowl geometry, and carb placement are design decisions, not afterthoughts. |
| Worked glass signals skill | Consistent wig-wags, latticino, and implosion work indicate technical discipline and typically better durability. |
| Medium pipes suit most daily users | A 4–5 inch pipe balances portability, airflow, and cleaning access for everyday U.S. use. |
| Anneal and COE are non-negotiable | Always confirm kiln annealing and COE-compatible materials before buying or commissioning. |
| Theelevatedremedies carries curated glass | From entry-level pieces to high-end handcrafted work, Theelevatedremedies in Ann Arbor stocks and advises on quality glass selection. |
The part of glass pipe artistry most buyers miss
Most people evaluating a glass pipe focus on the visual surface: the colors, the pattern, the overall shape. That’s understandable. The visual work is what draws you in. But the most important quality signals are the ones you can’t see at a glance.
Anneal quality is invisible until a piece cracks. COE compatibility is invisible until crazing appears weeks after purchase. Wall thickness uniformity is only visible when you hold the piece up to a light source at the right angle. These are the things that separate a piece that lasts years from one that fails at the worst moment.
The heady glass community figured this out early: the visual complexity of a worked piece isn’t just aesthetic. It’s a proxy for the maker’s patience and technical discipline across the entire production process. An artist who executes a clean wig-wag is also the kind of artist who anneals properly, checks COE compatibility, and finishes edges carefully. The visible craft and the invisible craft tend to travel together.
What I’d push back on in most buying guides is the emphasis on price as a quality signal. Price correlates with reputation and technique complexity, but it doesn’t guarantee anneal quality or COE compatibility. A $200 piece from an unknown maker can be better constructed than a $500 piece from someone who prioritizes visual drama over structural integrity. Ask the questions. Look at the joints. Hold it up to the light.
Theelevatedremedies carries handcrafted glass worth looking at
If you’ve read this far, you’re not shopping for a generic pipe. You want something with real craft behind it, and you want to know what you’re buying.
Theelevatedremedies at 1123 Broadway St in Ann Arbor stocks glass across the full range, from solid entry-level pieces to high-end handcrafted work with the kind of technique detail this guide covers. The staff can walk you through what makes a specific piece worth its price, what to look for in the construction, and how to care for it properly. For commissioning inquiries or questions about what’s currently in stock, stop in or reach out directly. Ann Arbor has always supported craft that takes itself seriously, and the selection at Theelevatedremedies reflects that. Browse the full smoke shop accessories range online, or come in and handle the pieces yourself. That’s still the best way to know if a pipe is right for you.
Recommended reading and references for deeper study
These are the most useful primary sources for anyone who wants to go further into technique, history, or the cultural context of glass pipe artistry.
- Pipe Making Techniques — Corning Museum of Glass LibGuides: The most authoritative curated list of pipe-making tutorials available online. Covers wig-wag, latticino, inside-out pipes, and freestanding hammer techniques with links to step-by-step video resources. Start here for hands-on learning references.
- Pipe Making: History, Culture, and Artists — Corning Museum of Glass LibGuides: The historical and cultural context for American glass pipe artistry, including the transition from counterculture utility to recognized functional art. Useful for understanding the exhibition and museum framing of this work.
- HotGlass Vol. 35 — Technique Overview: A practitioner-focused overview of core techniques including fuming, wig-wag, and dichroic work. Good for understanding how artists describe and categorize their own methods.
- How Glass Pipes Are Made — Weedmaps: A clear, accessible walkthrough of the production process from raw tubing to finished pipe, including the fuming process and color-change behavior with use.
- How to Make Glass Pipes: A Step-by-Step Guide — Green Plate Pursuits: Practical production guidance covering borosilicate properties, COE compatibility, annealing requirements, and workshop safety. Useful for anyone considering making their own pieces or wanting to ask better questions when commissioning.
For hands-on learning, no written guide replaces a workshop class. The Corning Museum of Glass and regional glass art centers across the U.S. offer beginner and intermediate lampworking courses where you can work directly with the techniques described here.