
Rinse your bubbler with warm water first, then pick your path: a 10-minute quick clean handles light residue, while a soak in 91%+ isopropyl alcohol and coarse salt tackles heavy buildup. Silicone pieces need gentler treatment. Whichever route you take, rinse until every trace of solvent smell is gone, then dry and reassemble.
TL;DR:
- Using a 91% isopropyl alcohol soak for heavy buildup can take several hours to overnight, while a quick ten-minute clean suffices for light residue.
- Proper cleaning requires disassembly of removable parts, careful use of solvents, and targeted agitation, especially for complex percolator chambers.
- Silicone bubblers are best cleaned with warm soapy water or vinegar and baking soda, avoiding prolonged alcohol exposure to prevent deterioration.
- Regular rinsing after each use is crucial to prevent resin hardening and reduce the need for deep cleaning.
- For stubborn resin inside intricate chambers, injecting solvent with a syringe and using pipe cleaners offers the best access and effectiveness.
Table of Contents
- What You Need to Clean a Bubbler Properly
- How Do You Do a Quick 10-Minute Bubbler Clean?
- How Do You Deep Clean a Heavily Resined Bubbler?
- Is It Safe to Clean a Silicone Bubbler the Same Way?
- What Do You Do When Normal Cleaning Doesn’t Reach the Perc?
- What Cleaning Habits Actually Damage Glass?
- How Often Should You Clean a Bubbler?
- What Do Smoke Shop Pros Recommend for Tricky Bubblers?
- The Method Matters Less Than the Habit
- Where to Get Bubbler Cleaning Supplies in Ann Arbor
- Sources
- FAQ
What You Need to Clean a Bubbler Properly
Before you touch a bottle of alcohol, get your supplies lined up. You’ll move faster and avoid the classic mistake of realizing halfway through that you’re missing a stopper.
- Solvent: 91%+ isopropyl alcohol works fastest on old resin; 70% isopropyl alcohol still works but needs a longer soak and more agitation.
- Abrasive: coarse salt (not fine table salt) scrubs resin loose as you shake.
- Alternatives: white vinegar and baking soda, lemon juice, or a commercial glass cleaner for anyone who wants to skip alcohol entirely.
- Tools: pipe cleaners, cotton swabs, a soft-bristle brush, rubber stoppers, a zip-top bag or soaking container, tongs, microfiber cloths, gloves, and a small syringe or squeeze bottle for hard-to-reach chambers.
Work in a ventilated space, away from open flame, and never pour boiling water over cold glass. If your piece has decals or logos, keep soak times shorter and skip harsh scrubbing near the artwork. Once you’re done, dispose of the used alcohol according to your local waste rules rather than pouring it down the drain.
How Do You Do a Quick 10-Minute Bubbler Clean?
This is the routine for regular users who rinse between sessions and just need to knock out light residue before it hardens into tar.
- Empty the bubbler completely and give it a warm water flush to knock loose surface debris.
- Plug the openings with your fingers or rubber stoppers, then add a small splash of isopropyl alcohol with a pinch of coarse salt (or hot soapy water if you’re avoiding solvents).
- Shake using a rotating pulse motion rather than a single direction. This pushes the solution through chambers and joints that a straight shake skips entirely, a trick detailed in Mood’s 10-minute method.
- Dump the solution, then rinse repeatedly with warm water until no alcohol smell remains.
- Air-dry on a towel or rack before your next session.
Pro Tip: Rotate the piece in a figure-eight motion while shaking. A back-and-forth shake tends to miss the same dead zones every time, while a rotating pattern forces solution into corners a straight shake can’t reach.
If the water runs cloudy or you still see a brown tint after two rounds, stop here. That’s your signal to move to a deep clean instead of repeating the quick method five more times.
How Do You Deep Clean a Heavily Resined Bubbler?
Heavy buildup, that dark amber coating lining the chamber, needs a longer soak and more deliberate technique than the quick method offers.
- Disassemble every removable part, downstems, bowls, screens, gaskets, and set aside anything non-glass so it doesn’t sit in solvent longer than necessary.
- Submerge the pieces in 91%+ isopropyl alcohol with a generous amount of coarse salt, either in a sealed bag or a dedicated soaking container, following the alcohol and salt method Weedmaps outlines.
- Let it sit. Moderate buildup usually clears in 30 minutes to a few hours; heavy tar can take an overnight soak, sometimes staged over two nights.
- Swap the solution if it turns dark brown partway through. A saturated solvent stops dissolving anything new.
- For percolators and recyclers, plug specific openings and inject solvent directly into the recycler path with a syringe or squeeze bottle, then agitate in short bursts so the solution actually reaches the chamber instead of just splashing past it.
- After the soak, use pipe cleaners and a bottle brush to scrub loosened residue from slits, joints, and percolator holes.
- If stains persist after a full soak cycle, an ultrasonic cleaner or a commercial glass restorer is the next step up. Both work well but are typically a last resort before considering professional restoration.
- Finish with several warm water rinses, checking for smell after each one, until the piece is completely odor free.
This exact disassembly and soak protocol lines up with what CleaningBro’s fast, safe steps guide recommends for stubborn resin.
Is It Safe to Clean a Silicone Bubbler the Same Way?
Not quite. Silicone holds up differently than glass, and treating it identically risks degrading the material over time.
- Many silicone pieces are dishwasher-safe, which makes them genuinely easier to maintain than glass in daily use.
- For hand-washing, warm soapy water or a vinegar and baking soda soak works well and is gentler than straight alcohol.
- Limit how long silicone sits in isopropyl alcohol. Prolonged exposure can dry out or weaken some silicone gaskets, according to Weedmaps’ care guidance.
- Remove any silicone attachments before soaking a glass bubbler’s glass components in solvent, then clean them separately.
- Dry silicone pieces fully before reassembly. Trapped moisture inside folds and seams breeds odor and mildew faster than you’d expect.
What Do You Do When Normal Cleaning Doesn’t Reach the Perc?
Percolators and recyclers create dead zones, pockets where shaking alone never generates enough turbulence to move solvent through. That’s not a flaw in your technique. It’s just geometry.
- Isolate the problem chamber by plugging every other opening with a stopper or your finger.
- Inject solvent directly into the recycler arm or perc slits with a syringe, then agitate in short, sharp bursts rather than one long shake.
- Use a thin pipe cleaner for narrow slits and small ports where a brush simply won’t fit.
- If a soak and targeted agitation haven’t cleared it after a couple of attempts, stage a longer overnight soak before trying again.
- When alcohol and salt genuinely fail, an ultrasonic cleaner or a shop’s professional restoration service is the reasonable next move, particularly for complex recycler designs with multiple internal chambers.
Pro Tip: Hold the piece up to a window before you start. Seeing exactly where the resin is thickest tells you which chamber needs direct injection instead of guessing based on shape alone.
Go easy near decals and thin blown-glass sections. Aggressive agitation that’s fine for thick borosilicate can crack or peel decoration on thinner pieces.
What Cleaning Habits Actually Damage Glass?
Do use warm water, not boiling. Sudden heat against cold glass causes thermal shock, which can crack a piece instantly, a risk Mood’s cleaning guide flags specifically for thick borosilicate versus thinner glass.
Don’t use metal scouring pads on glass or acetone on decorated pieces. Both strip away detail and scratch surfaces that pipe cleaners and salt handle just fine.
Do rinse until the alcohol smell is completely gone, work in a ventilated room, and wear gloves if you have sensitive skin.
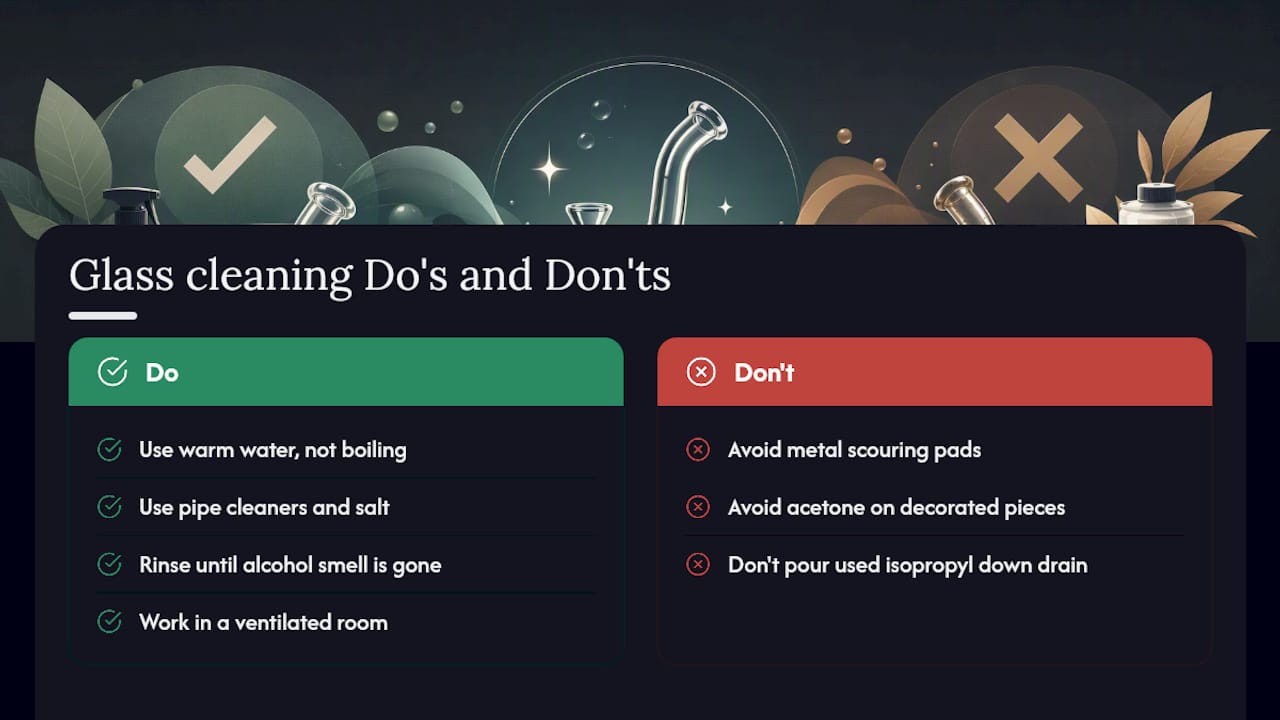
Don’t let used isopropyl alcohol go down the drain. Dispose of it according to local hazardous waste guidelines instead.
How Often Should You Clean a Bubbler?
A quick rinse after every session prevents resin from ever hardening into the tar that requires a deep clean in the first place.
- Daily users: rinse after each session, quick clean weekly.
- Occasional users: deep clean monthly, or whenever draw quality drops.
- Warning signs: a brown tint inside the chamber, harsh or off-tasting hits, and noticeably poor draw all mean it’s overdue.
Fresh water every session and an ash-catcher attachment both cut down how often you need a full deep clean, since less debris ever reaches the main chamber.
What Do Smoke Shop Pros Recommend for Tricky Bubblers?
Juiced, writing for a smoke shop blog, points to a few habits that separate a clean piece from a cracked one. Match your rubber stopper size to the joint exactly. A loose stopper lets solvent leak mid shake, and an oversized one risks chipping the joint.
Soft nylon-bristle brushes clean percolator holes without scratching glass the way stiffer bristles can. For fumed or painted glass, keep soak times on the shorter end and check the piece every 15 minutes rather than walking away for hours, a precaution covered in Elevated Remedies’ guide to protecting fumed glass.
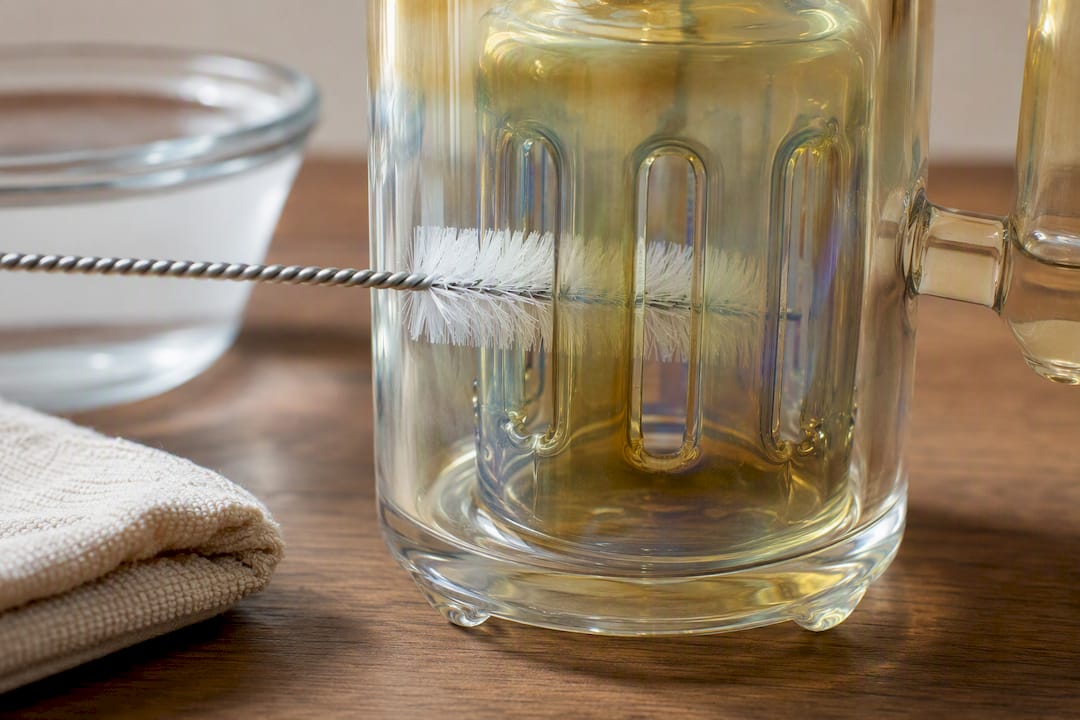
If a recycler or multi-chamber perc has gone untouched for months and staged soaks aren’t clearing it, that’s the point to bring it into a shop for ultrasonic restoration rather than risk cracking it at home.
The Method Matters Less Than the Habit
Most guides treat bubbler cleaning like a single event: something you do once a piece is already caked and unusable. That framing is backwards. The research behind both the quick and deep methods points to the same underlying truth: agitation and access matter more than which solvent you grab off the shelf.
Where conventional advice falls short is percolators. Most people shake a recycler bubbler exactly like a straight tube and wonder why the perc still looks dirty after three soaks. It’s not a solvent problem. It’s an access problem, and no amount of alcohol fixes turbulence that never reaches the chamber.
If you take one thing from this, prioritize the rinse habit over the deep clean. A piece rinsed after every session rarely needs the overnight soak at all. Buildup is cumulative, not inevitable, and the 10-minute routine done consistently beats a heroic deep clean done rarely.
— Juiced
Where to Get Bubbler Cleaning Supplies in Ann Arbor
Once you know the method, the harder part is often just having the right stopper size or brush on hand when you need it. Theelevatedremedies stocks the pipe cleaners, brushes, and glass accessories that make both the quick and deep-clean routines faster, without the guesswork of grabbing whatever’s in a kitchen drawer.

Our Ann Arbor smoke shop at 1123 Broadway St carries bubblers, dab rigs, and accessories alongside the cleaning tools that keep them running well, and our staff can walk you through care for delicate or decorated glass in person if you’d rather not guess. If you’re curious about what else is worth exploring in the shop, our amanita muscaria page is a good starting point for anyone looking into our mushroom products alongside smoke shop essentials. Stop by or check the site to see what’s in stock before your next deep clean.
Sources
- How to Clean a Bubbler | Weedmaps
- How to Clean a Bubbler Pipe: Fast, Safe Steps - CleaningBro
- How to Clean a Bubbler with Alcohol and Salt in 10 Minutes | Mood
FAQ
What Is a Small, Easy-to-Clean Bubbler?
A compact bubbler with a single chamber and no complex percolator, straight tubes and basic hammer-style pieces, rinses fast and rarely needs more than the 10-minute quick clean.
Will 70% Isopropyl Alcohol Clean My Bubbler?
Yes, 70% isopropyl alcohol will clean a bubbler, but it works slower than 91%+ and needs a longer soak plus more agitation to break down the same resin.
How Long Should I Soak a Bubbler in Alcohol and Salt?
Light to moderate buildup usually clears in 30 minutes to a few hours, while heavy tar can require an overnight soak or two staged soaking sessions.
Can I Put My Silicone Bubbler in the Dishwasher?
Many silicone bubblers are dishwasher-safe, which makes them simpler to maintain than glass, though you should remove any glass or metal attachments first.
How Do I Clean the Percolator Part of a Bubbler?
Plug the surrounding openings, inject solvent directly into the percolator or recycler path with a syringe, and agitate in short bursts so the solution reaches chambers a normal shake misses.